
Invoice template customisation
Customise your MyPetParlor invoices to reflect your brand and meet diverse business needs. Create multiple invoice templates with custom header and footer images, address overrides, tax IDs, and display rules — then assign the right template to each customer.
Overview#
MyPetParlor's invoice template customisation lets you effortlessly craft and customise multiple invoice templates, catering to diverse business scenarios. Whether you manage multiple trading names within one organisation, issue distinct invoices with unique logos and company details, or run separate rules for wholesale versus retail customers, this feature offers the flexibility to adapt invoices to the evolving requirements of both your business and your customers.
Every template inherits your company name, contact details, tax IDs, and addresses from your business entity, then layers on per-template branding, display rules, and overrides on top.
Key Benefits#
- Branding consistency. Customise invoices with your company's logo, footer image, and accent colour to ensure a uniform and professional presentation across every invoice you send.
- Flexibility and control. Create multiple templates to cater to different trading names or customer segments, each with its own set of display rules, addresses, and tax fields.
- Efficiency and scale. Streamline invoicing as your business grows, without compromising the quality or clarity of communication with your customers — add templates instead of workarounds.
Default and Alternate Templates#
Every business entity ships with a default template, pre-populated from the entity information, address, and tax IDs you captured during setup. The default is applied automatically to every customer unless you assign an alternate.
Alternate templates are layouts you create on top of the default. You can build up to 30 alternate templates per template type per business entity, each with its own header image, footer image, address override, and display rules. Once you have a few in place, you can promote any one of them to be the new default — handy when a new trading name takes over from an old one.
Changing or assigning a template only affects invoices generated after the change. Already-issued invoices keep the template they were sent with, so your audit trail stays intact.
Creating an Invoice Template#
- Go to Settings and open Email Templates.
- Click the Invoice tab to see your invoice templates.
- Choose the template type you want to create and click New template in the top-right of the template type.
- Give the template a name, confirm the type (e.g. New Invoice), and optionally add a short description so your team knows what this template is for. Click Create template to generate it.
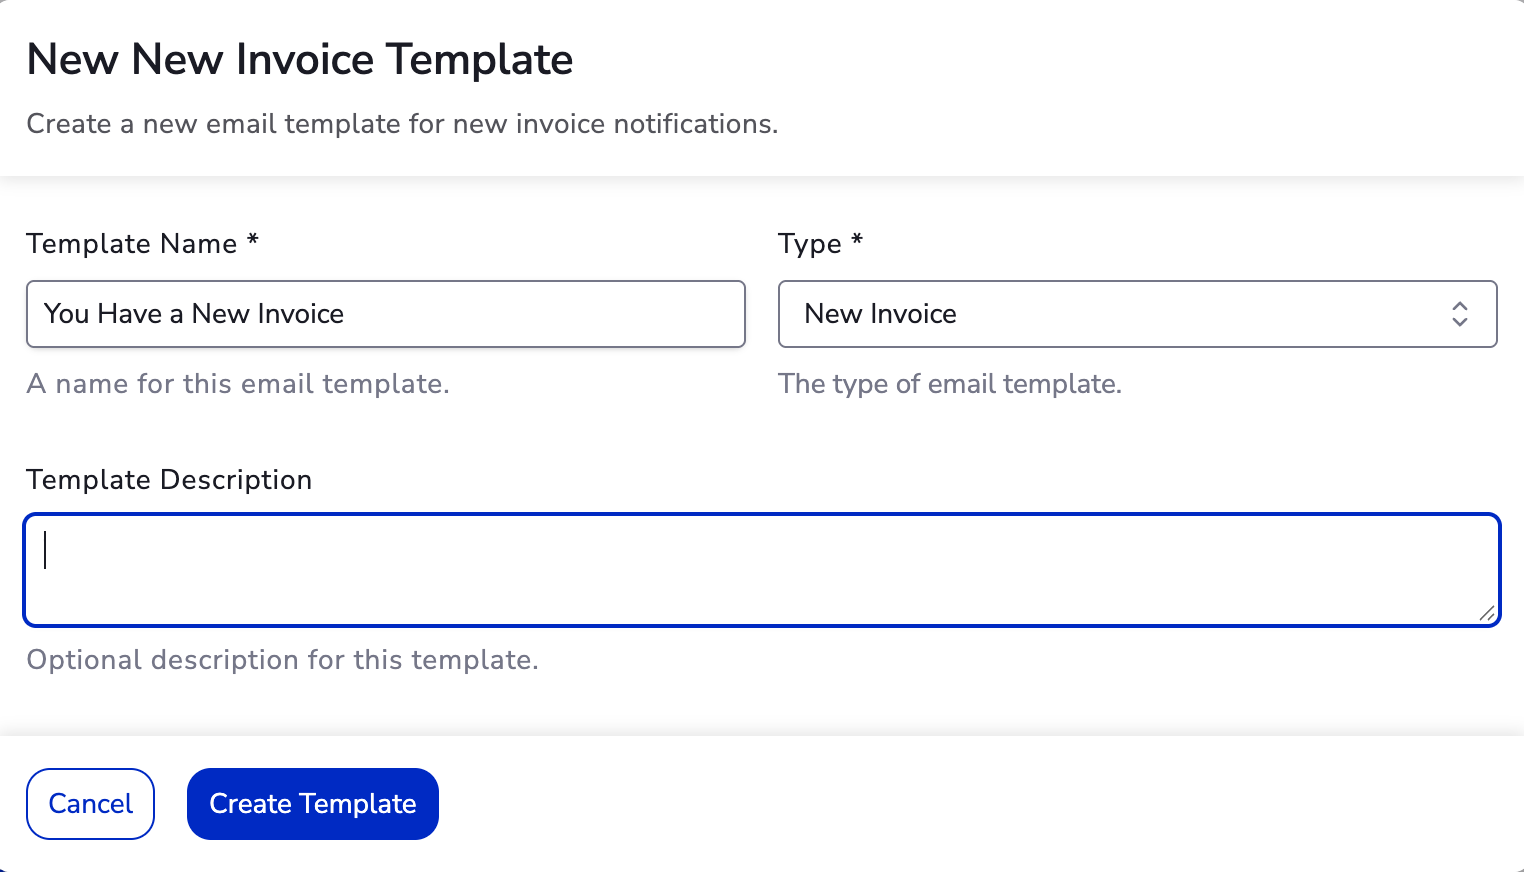
The dialog only seeds a new template from the defaults — branding, address overrides, display rules, custom fields, and footer text are all configured on the template's own editor page, covered in the sections below.
Once you're in the editor, use Preview template to see a sample PDF rendered with placeholder invoice data and your configured fields. It uses fake line items and totals, but renders your real logo, address, and tax fields — handy for catching layout issues before any customer sees them.
Assigning a Template to a Customer#
Templates are assigned at the customer level. To set or change the template on an account:
- Open the Customers section and select the customer you want to update.
- Click Edit on the customer information panel.
- Scroll to Invoice template and pick a template from the dropdown. Choose Default to fall back to the business entity default.
- Click Save to apply.
The next invoice generated for that customer will use the newly assigned template; existing invoices are not re-issued or rewritten.
Template assignment can also be managed via the MyPetParlor API — assign, reassign, revert to default, view a customer's current template, or list every customer assigned to a given template. Template creation and editing is dashboard-only.
Header and Footer Images#
Each template can carry its own header image and footer image, independent of the default and of every other template.
| Slot | Where it appears | Typical use |
|---|---|---|
| Header image | Top of the PDF and email header | Logo for the trading name or brand on this template |
| Footer image | Bottom of the PDF | Secondary branding, payment instructions, or legal marks |
Acceptable file types are PNG, JPG, and GIF, up to 256 KB each. Upload high-resolution assets so they stay crisp at print sizes.
If you split wholesale and retail onto separate templates, give each one a distinct header image. Customers spot the difference instantly and your support team has less explaining to do.
Hiding Line Item Dates#
Under the template's Body section, tick Hide line item dates to drop service dates from each line on invoices generated with this template. Useful when your invoices read more like product receipts than dated service logs.
Hiding Zero-Charge Line Items#
Also under Body, tick Hide zero-charge line items to suppress R0.00 lines — typically promotional add-ons, included items, or fully-discounted services. The invoice stays focused on what the customer is actually paying for.
Overriding the Business Address#
By default a template uses the entity address you configured on your business entity. In the template's Header section, tick Customise invoice display address and fill in the fields to show a different address on every invoice issued from this template. This is the right tool when you trade under multiple names or bill from more than one location under the same legal entity.
The address override is display-only. Tax calculations continue to use the tax address on your business entity, not the value you enter here. If your tax position genuinely differs, set up a separate business entity instead.
Tax IDs, Custom Fields, and Footer Text#
Tax IDs and registration numbers default to the values you set up under Tax ID for invoice display on the business entity. Override them on a template only when a specific trading name or jurisdiction needs a different number — most customers should leave the defaults alone.
Custom fields capture extra context your customers need on the invoice, and live alongside the standard tax fields:
| Custom field | Purpose |
|---|---|
| PO number | Match invoices to customer purchase orders |
| Contract reference | Tie invoices to signed agreements |
| Cost centre | Help customers route invoices internally |
| Internal reference | Capture your own tracking codes |
Custom fields render near the invoice header on the PDF, in the email body, and in CSV exports.
The footer text field below the totals is where disclaimers, payment instructions, and statutory notes live. Keep it concise — long footers push line items onto extra pages.
Avoid putting sensitive information in custom fields. Anything you add here is visible to the customer on every invoice generated with this template.
Preview and Test Send#
Before you assign a new template to live customers, validate it end-to-end:
| Check | What to confirm |
|---|---|
| PDF preview | Branding, layout, totals, and address render correctly |
| Email send | Subject line, sender name, and body match the assigned brand |
| Tax fields | VAT number, registration number, and tax IDs appear correctly |
| Custom fields | Every expected custom field renders in the right place |
| Footer | Footer image and legal text are current and accurate |
Generate a test invoice on an internal customer, send it to a teammate, and open the PDF on both screen and print to be sure.
What Template Changes Don't Affect#
Editing an invoice template does not retroactively update invoices that have already been issued, and it does not change the content of your transactional emails. Email subject lines, body copy, and reply-to addresses are configured separately under your email template settings; the invoice PDF is attached to those emails with your template's branding applied.
Related Articles#
- What is a Business Entity?
- Set Up a Business Entity
- Automated Invoicing
- Edit Invoice
- Invoice Management
Images#
Placeholder images are used below. Final assets will be added in a future update.

