Automated invoicing
Set the site-wide defaults that drive every automatic invoice in MyPetParlor — terms, notes, refund handling, VAT messaging, email behaviour, and the rules that govern subscription upgrades and downgrades.
Automated invoicing in MyPetParlor takes the manual work out of billing. Whenever a customer signs up to a subscription or a charge becomes payable, MyPetParlor generates the invoice, attempts collection, and emails the customer — all using the defaults configured on this page. The settings below let you keep every invoice consistent, on-brand, and aligned with your tax and compliance requirements, while still leaving room to override individual invoices when you need to.
Key Benefits#
- Less manual work, fewer mistakes. Invoices are raised, delivered, and reconciled automatically, so your team isn't chasing line items by hand or copying numbers between systems.
- Consistent, on-brand billing. Site-wide defaults for terms, notes, and bill-to behaviour keep every invoice looking the same — and you can still override anything per invoice when a customer needs special treatment.
- Tax and compliance built in. VAT reverse-charge messaging, bill-to address rules, and tax-aware defaults help your invoices meet the rules of the jurisdictions you operate in.
Default Values#
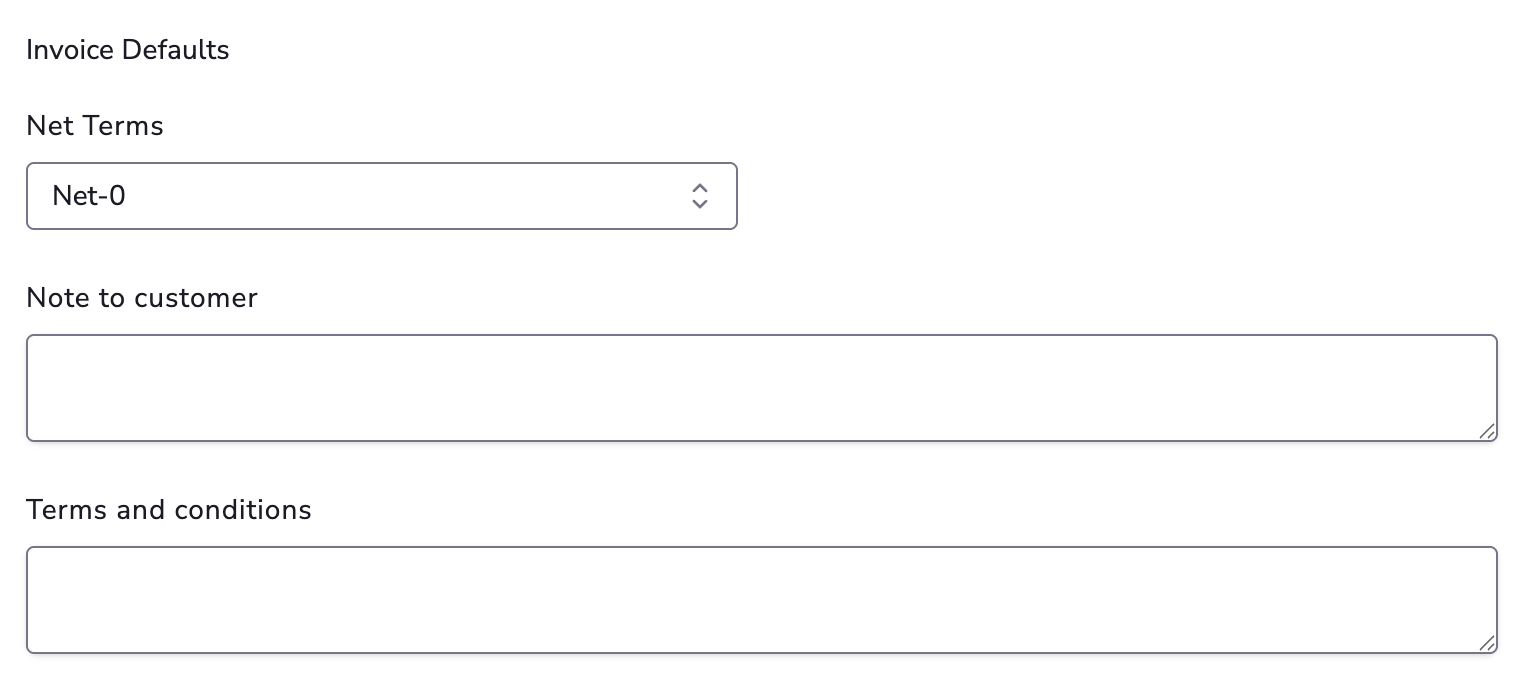
Customize your invoices with default terms and notes for your customers. These site-level defaults can be overridden with invoice-specific messages whenever you generate an invoice through the dashboard or API.
The default term for all automatic and manual invoices is On-Receipt. This means invoices are due immediately upon creation. For automatic invoices, collection is attempted immediately using the payment method on file. For manual invoices, the invoice becomes past due immediately upon creation.
Note to Customer#
A free-form notes section for any details you would like to add. It is ideal for invoice details or a special message such as "Thanks for your business." The note only appears on an invoice when the field contains text, and it does not display a section title. Customer notes appear at the bottom of the invoice in a larger font than the Terms and Conditions.
Terms and Conditions#
A notes section for any details you would like to add — typically payment or contract terms. The section title cannot be changed. Terms and Conditions only appear on an invoice when the field contains text.
Terms#
Terms configuration applies to all invoices. Use it to set the default collection term (such as On-Receipt or net terms). See manual invoicing for term behaviour on manual invoices and the section on collection terms in the automatic invoicing terms reference for automatic invoice behaviour can be seen here.
Upgrades, Downgrades, Subscription Edits#
Decide whether to send out paid invoices when a subscription is upgraded or downgraded. You can also choose how to handle proration when a subscription is edited: all proration, partial proration, or no proration or credits.
Subscription Alignment#
Selecting Subscription Alignment clears the Account Bill Date once the last subscription on an account expires. If a new subscription is later created on that account and no other active subscriptions exist, the Account Bill Date is updated to the new subscription's created date.
This setting is only available if your site has the Aligning Renewals feature enabled.
Refunds#
Determine how MyPetParlor handles declined refund transactions:
- Issue Credit (default) — issue a refund credit invoice for the amount that the gateway declined to refund, so the credit remains available on the account.
- Block — prevent the declined transaction or block issuing a refund credit.
VAT Reverse Charge Notes#
If you use the EU VAT feature for tax collection in the European Union, a notes section titled VAT Reverse Charge Notes appears whenever a customer provides a valid VAT number and is located in a different country than your own. The notes are pre-filled with a general statement that no VAT was applied to the invoice and that the customer may be responsible for VAT. You can edit this default message with any wording you prefer, and you can also override it per invoice.
Email Settings#
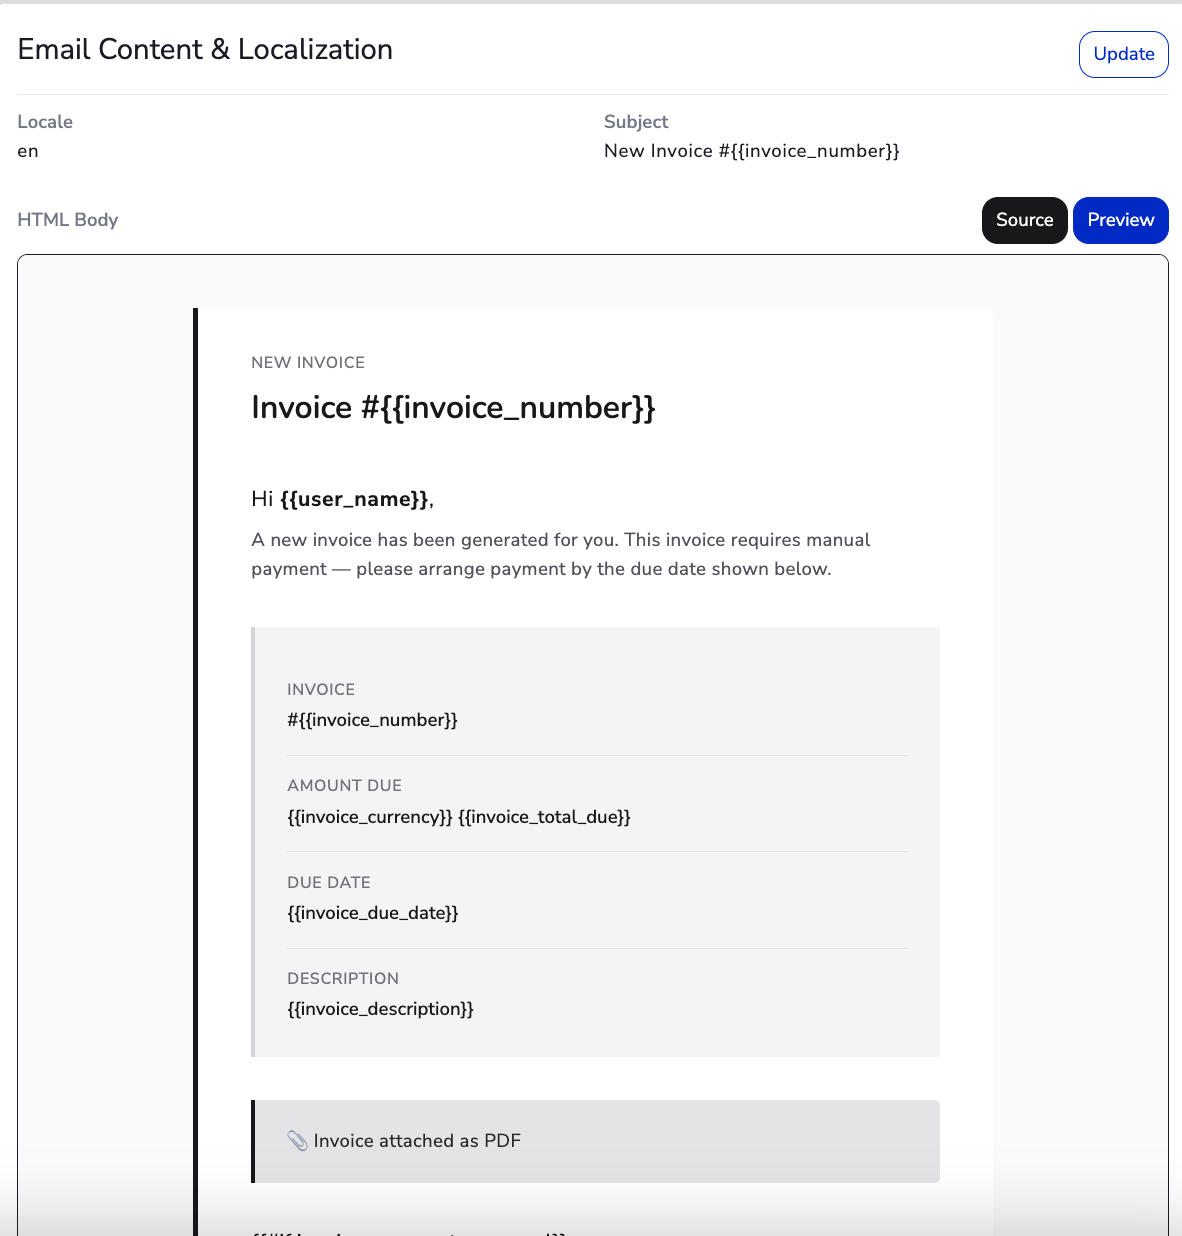
MyPetParlor attaches a PDF copy of the invoice to the email sent to the customer. Seven of the standard templates reference an invoice — switching the toggle on for those templates adds the PDF to every email they send.
The seven templates that support invoice PDF attachments:
- New Subscription
- New Invoice (Manual Invoicing only)
- Invoice Past Due (Manual Invoicing only)
- Payment Confirmation
- Payment Declined
- Payment Refunded
- Payment Voided
Bill To Address#
Enabling Use Account Info Address for all Invoices forces every invoice to display the address held on the customer's account, regardless of which payment method is on file. The setting lives under Settings → Taxes → Tax Settings — switch it on and save the page. The selected address is shown on the invoice in the Bill To block and is also used for tax calculations.
This is useful when you need to:
- Show a shipping or postal address on the invoice rather than the cardholder address.
- Calculate tax based on a delivery or postal address.
When the customer doesn't have an Account Info Address on file, MyPetParlor falls back as follows:
- Automatic collection invoices use the Billing Info — including its address, name, and VAT number.
- Manual collection invoices still try to use Account Info, so the invoice ends up with no address printed in the Bill To block.
Modification Enforcement#
Some merchants prefer customers to be current on all payments before allowing a subscription upgrade or downgrade. MyPetParlor exposes this as two settings on the Invoice Settings page.
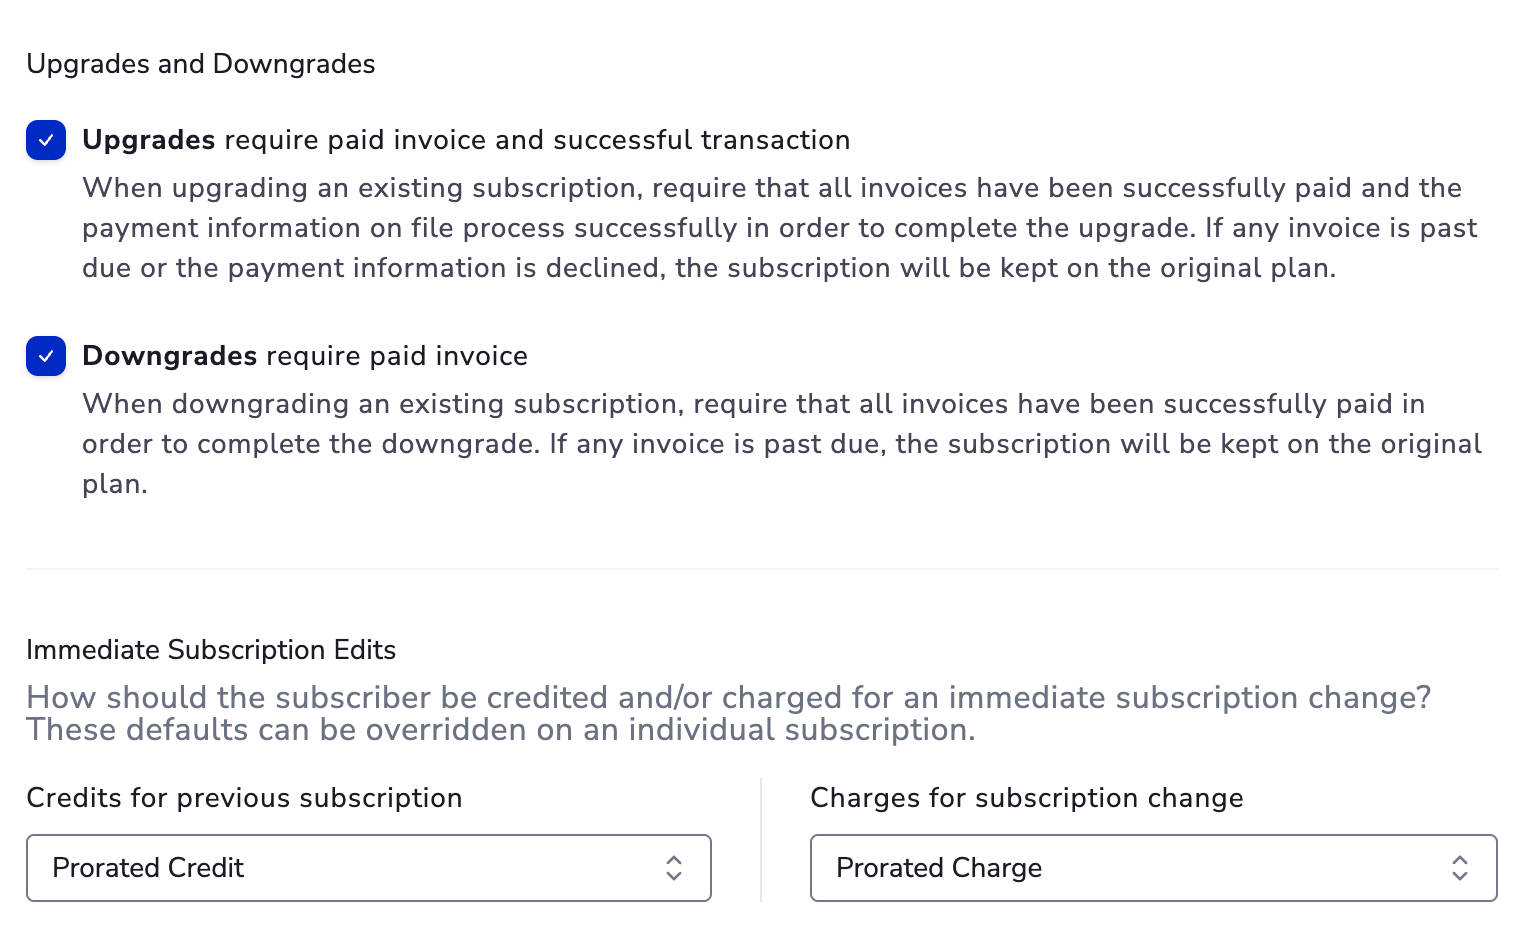
Require paid invoice and successful transaction on upgrades#
When this setting is enabled, any time a customer upgrades — or is upgraded through the dashboard — the account must have no past due invoices and the upgrade invoice must be paid. An upgrade is defined as any increase in subscription price from changing the base price, changing the quantity, adding add-ons, or changing to a more expensive plan.
When a customer attempts to upgrade, MyPetParlor first checks for automatic collection invoices on the account. If any exist, it attempts collection on those past due invoices first. If they cannot be successfully collected, the upgrade is blocked and the customer sees: "Your account is currently past due, please update your billing information before changing your subscription." If the past due invoices are successfully collected — or the account had none — MyPetParlor attempts to collect on the upgrade. If the upgrade transaction declines, the upgrade is blocked. If it succeeds, the upgrade goes through.
If you are using the API, be sure to offer your customers a way to update their billing information in this scenario so they can proceed.
Require paid invoice to downgrade#
When downgrading an existing subscription, require that all invoices have been successfully paid in order to complete the downgrade. A downgrade is defined as any decrease in subscription price from changing the base price, decreasing the quantity, removing add-ons, or changing to a less-expensive plan. If any invoice is past due, the subscription stays on the original plan and the customer sees the same error: "Your account is currently past due, please update your billing information before changing your subscription."
Notes#
- With this setting enabled, customers cannot downgrade if they have a past-due payment.
- These settings apply only to immediate upgrades or downgrades. Changes scheduled for the bill date or term renewal are allowed even with an unpaid invoice on file.
Integration Notes#
A few things worth keeping in mind when you wire automated invoicing into the rest of your stack.
API integration#
MyPetParlor's API exposes the full automated-invoicing surface — defaults, overrides, and the invoice lifecycle itself. Consult the API documentation for the endpoints, payloads, and authentication details you'll need.
Webhooks#
Webhook events fire whenever an invoice is created, paid, refunded, written off, or voided. Subscribe to the events you care about and you can keep your accounting system, CRM, or data warehouse in sync with MyPetParlor in close to real time.
Customisation limitations#
While very flexible, a handful of fields and headings are deliberately fixed — the title of the “Terms and Conditions” section. Have a look through the defaults before you commit to a particular invoice layout so there are no surprises later.
Error handling#
When you call the API, plan for the calls that fail as well as the ones that succeed. Retry transient errors, log permanent ones, and surface anything actionable to a human so failed invoices don't quietly pile up.
Security considerations#
Stick to the basics: HTTPS on every call, secrets kept out of source control, and tightly scoped API keys per integration. Rotate credentials when anyone with access to them leaves.
Compliance and tax#
Automated invoicing is built to handle common tax scenarios — EU VAT in particular — but tax rules differ between jurisdictions and change over time. Run your invoice configuration past a tax advisor for each region you trade in.
Rate limiting#
The API enforces rate limits to keep the platform responsive for everyone. Batch where you can, back off on 429 responses, and design your integration so a burst of invoices doesn't take itself out of action.
Testing environment#
Before you point a production integration at automated invoicing, exercise it end-to-end in a sandbox: customer creation, subscription sign-up, invoice generation, payment, refund, and webhook delivery.
Manage Automated Invoicing in MyPetParlor#
Step 1: Open invoice settings#
- Sign in to your MyPetParlor dashboard.
- In the left sidebar, open Settings.
- Click Business Entity and scroll to the Invoice Settings section.
Step 2: Set your default values#
- Under Invoice Defaults, add anything you'd like to appear on every invoice in the Terms and Conditions and Note to Customer fields.
Step 3: Configure VAT Reverse Charge Notes (if applicable)#
- If the EU VAT feature is enabled, edit the VAT Reverse Charge Notes to match your preferred wording.
- The default message itself lives under Settings → Taxes → Tax Settings.
Step 4: Configure email behaviour#
- Open each of the seven invoice-related email templates and make changes to suit.
- Review the wording while you're there so nothing reads as out of date.
Step 5: Configure the Bill To address#
- Go to Settings → Taxes → Tax Settings.
- Enable Use Account Information Address for all Invoices and save the page.
Step 6: Review the sample invoice#
- The Business Entity page renders a live sample invoice that reflects your defaults — give it a once-over to make sure everything reads the way you intend.
Step 7: Set modification enforcement (optional)#
- In the Modification Enforcement section, switch on the upgrade and downgrade rules that suit your business.
- Save your changes.
Step 8: Test the configuration#
- Raise a test invoice on a sandbox account to verify every setting behaves as expected.
- Adjust anything that doesn't look right back on the Business Entity page.
Step 9: Save and go live#
- Click Save Changes at the foot of the Business Entity page.
- The new defaults take effect immediately and apply to every invoice raised from this point on.