

Build a Workflow
Build an automated WhatsApp conversation on the visual canvas — drag steps from the palette, connect them, test in the simulator, and publish when it validates cleanly.
This guide walks you through building a WhatsApp Workflow from a blank canvas to a published, live conversation. If you haven't read the overview yet, start there — this article assumes you know what workflows are for.
Find your workflows under WhatsApp → Workflows in the portal.
The Canvas at a Glance#
A workflow opens in a full-screen visual builder:
- The palette (left) lists every step you can add, grouped into Triggers, Messages, Inputs, Logic, Actions, and End — with a filter box to find a step by name.
- The canvas (centre) is where you arrange steps and draw the connections between them.
- The inspector (right) shows the configuration of whichever step you've selected.
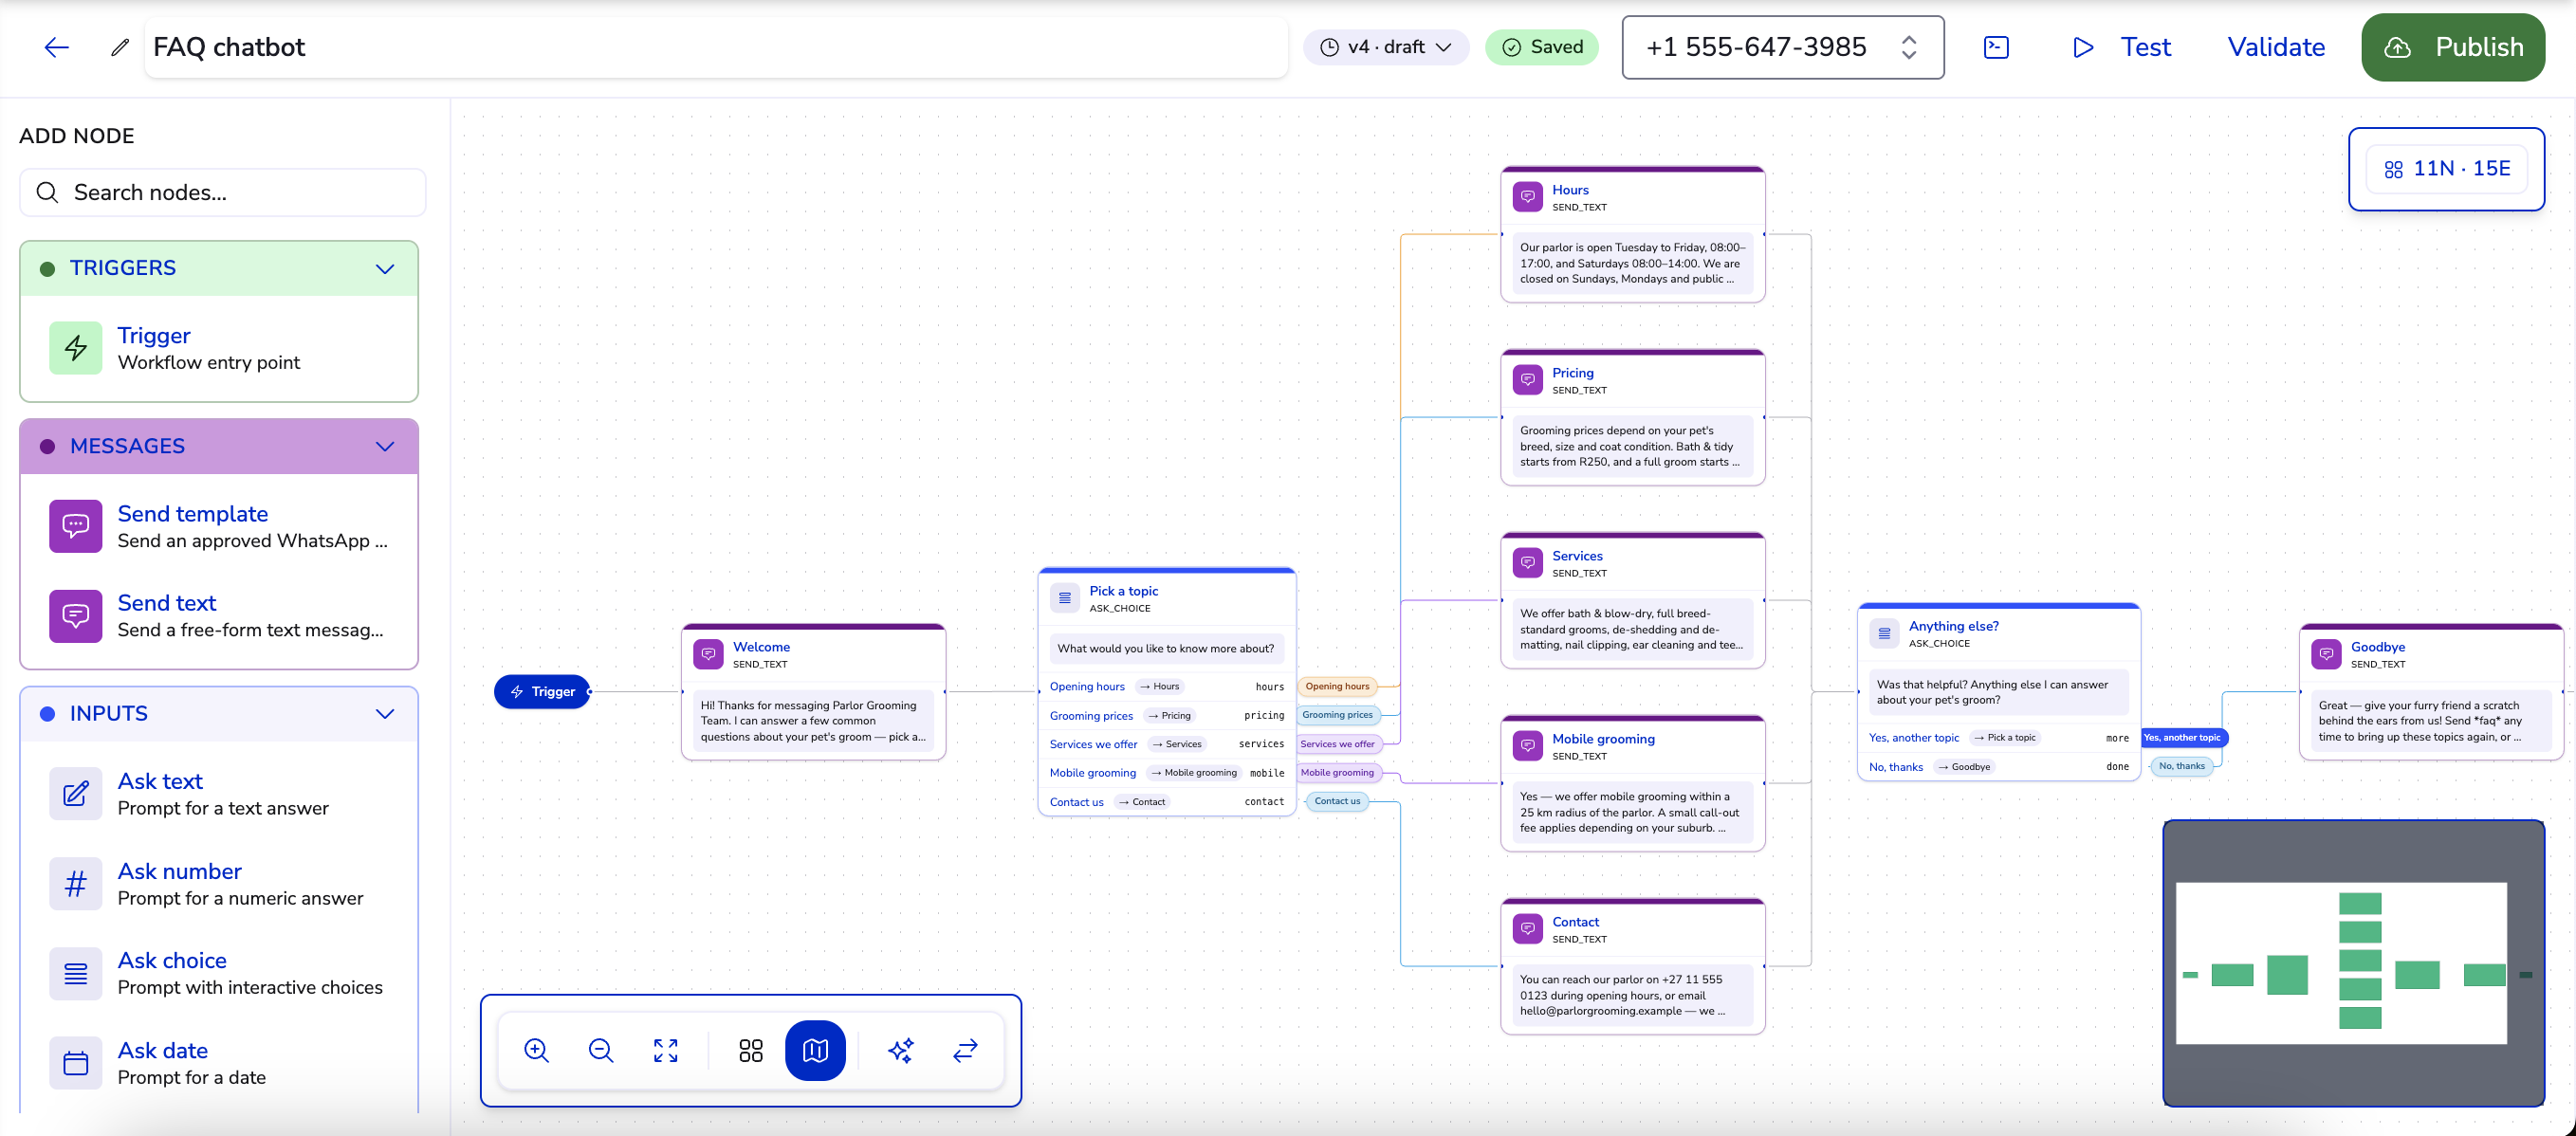
Drag a step from the palette onto the canvas, then drag from one step's output handle to another step's input to connect them. Every workflow starts from a Trigger step — the entry point that decides which customer messages start this conversation.
Draft, Active, Archived#
Workflows are versioned, and each version has a status:
| Status | What it means |
|---|---|
| Draft | Editable. This is the only status where the canvas accepts changes. |
| Active | Published and live — customers are running through it. Read-only. |
| Archived | Retired, kept for audit history. Read-only. |
Published versions are locked on purpose: you never edit the conversation a customer might be halfway through. To change a live workflow, create a new draft version from it, edit the draft, and publish — you'll see "Created draft v3 from v2." and the new version goes live when you publish it.
The version history panel lists every version of the workflow. From there you can open an older version, export it, archive it, or delete a draft you no longer need (only drafts can be deleted — published versions are archived instead, preserving the audit trail).
Configure Each Step#
Select a step to edit it in the inspector. Every step has a Label (what you see on the canvas), plus configuration specific to its kind — a prompt and a variable name for input steps, a message body for send steps, conditions for branches. The full catalogue of steps and their settings is in the Workflow step reference.
Input steps store the customer's answer in a variable (like fullName or preferredDate) that later steps can use — in message text, branch conditions, or computations.
Test in the Simulator#
Before publishing, select Test to open the simulator. It plays your workflow as if you were the customer — you type replies, tap choices, and watch the conversation take the paths you built. No real WhatsApp messages are sent.
Walk every branch at least once in the simulator, including the "wrong answer" paths — it's much cheaper to find a dead end here than after a customer does.
Validate and Publish#
The builder continuously checks your draft for problems — steps with missing configuration, unreachable steps, dangling connections. Run Validate at any time; a clean draft reports "No validation issues — ready to publish."
When you publish:
- Validation runs first — if there are errors, publishing stops with "Cannot publish: N error(s) must be fixed."
- On success — "Workflow published — now live." — the version becomes Active and customers messaging your number can enter it immediately.
- Any previously active version of the same workflow is superseded.
Housekeeping#
- Archive a version you no longer want live — it stays in history and can be re-published later.
- Export any version as a JSON file for backup or to move it between workspaces — see Import and export workflows.
- Delete only works on drafts, and it's permanent.
Workflows send their messages through your approved message templates when starting conversations — make sure the templates a workflow relies on are approved before you publish it.