Configure a Payment Gateway
Update an existing gateway's API credentials, accepted card types, currencies, and status. All settings from initial setup can be modified at any time.
You need the "Owner" role in order to configure an existing payment gateway.
Once you've added a payment gateway, you can return to its configuration page at any time to update credentials, change accepted card types and currencies, or adjust other settings. All options below were set during the initial setup and can be modified as your requirements change.
Gateway Configuration#
Navigate to your gateway configuration page by clicking Configure on the top-left corner of the payment gateway.

Optional Settings#
The following settings are configured when you first add a payment gateway. You can update any of them from the configuration page:
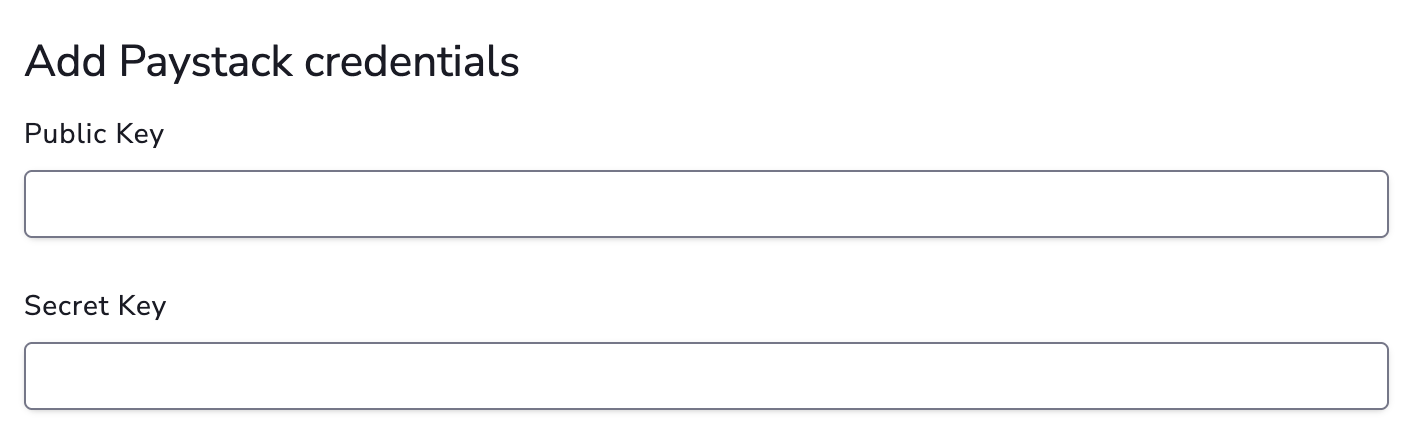
1. API Credentials#
Update your gateway API credentials (these are typically different from your virtual terminal login credentials).
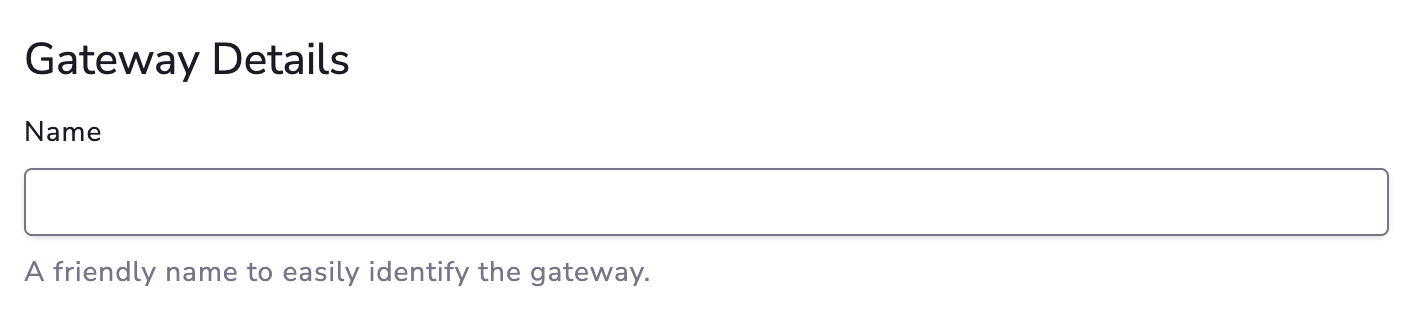
2. Gateway Details#
Change the display name and description to help identify this gateway.
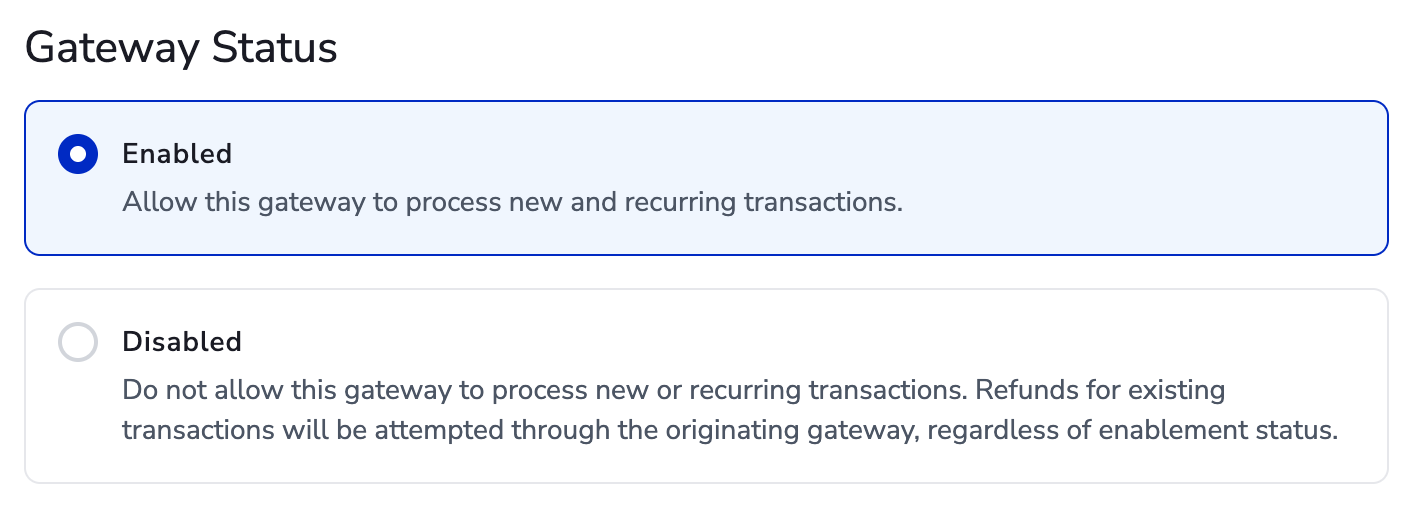
3. Gateway Status#
Set to Enabled or Disabled. By default, a gateway is set to Enabled when first added.
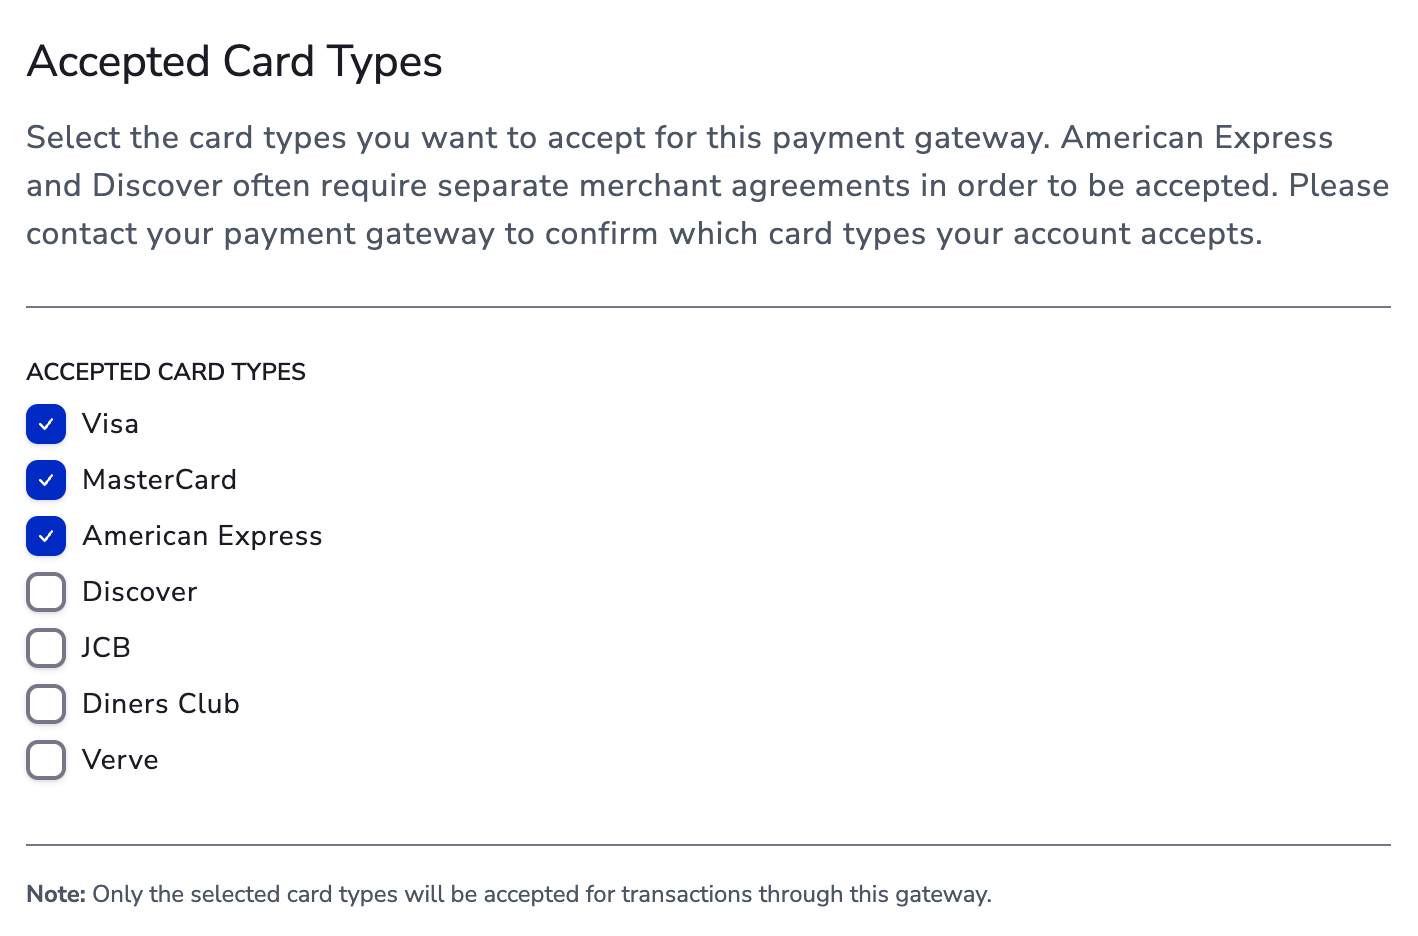
4. Accepted Card Types#
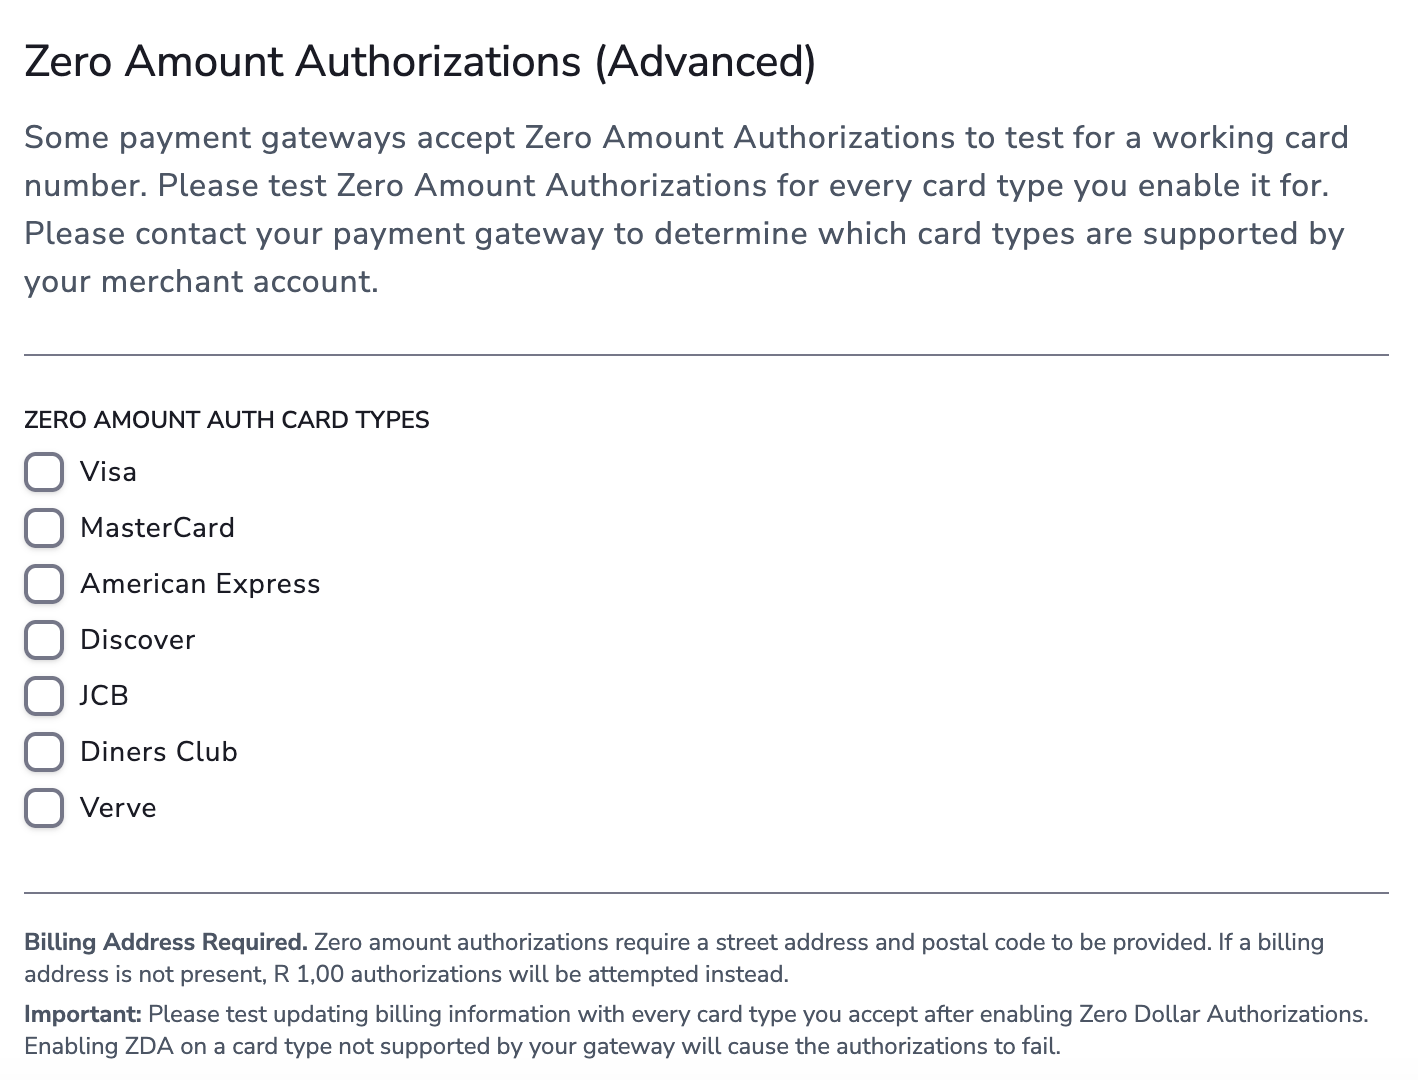
Update which card types are accepted. Make sure they are also supported and enabled on your gateway account.
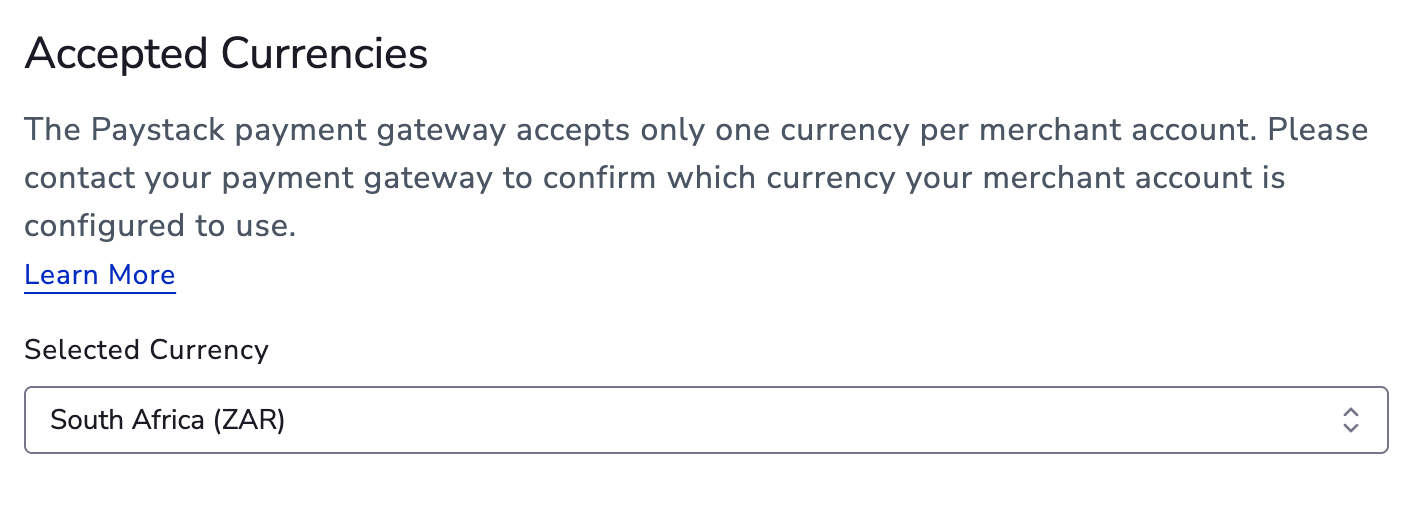
5. Accepted Currencies#
Change the currencies your gateway supports for processing transactions.
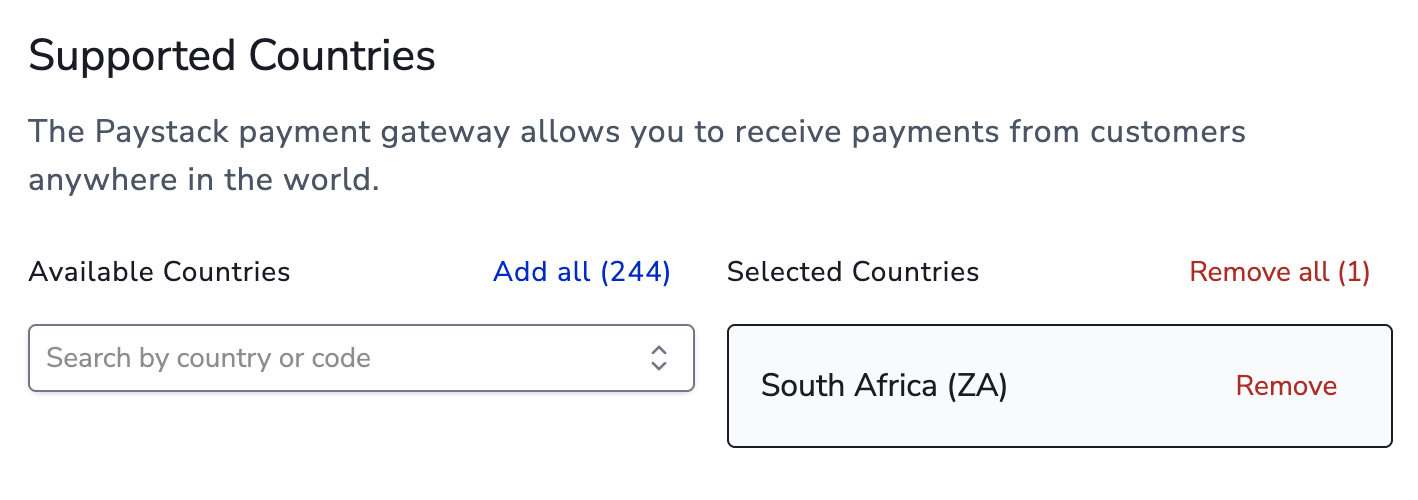
6. Supported Country#
Update the country to match where your gateway account is registered.
7. Zero Dollar Authorization (ZDA)#
Configure ZDA settings if applicable.